A short guide to using the new HowTo schema.
Google let the world know they would officially start supporting new types of schema.org markup, QApage, FAQpage, and HowTo in 2018. These new types of schema are sure to help optimize your content for voice search. This post will guide you through the process of marking up a How-to article using the new HowTo schema.
You’ll need about 1 hour and 30 minutes to mark up your content in HowTo schema. Or, if you’re using Gutenberg blocks inside WordPress 5.0+, you can use Yoast Structured data blocks.
Getting started with HowTo markup
Step 1: Write an article that tells users how to do something.
This is an important step. You can’t use HowTo without having content for it to work with. Google shares an example of changing a tire, but a really common use-case would be for recipes. Or perhaps you already have content that you want to mark up. Fantastic! It just may need some formatting to fit the HowTo schema construct.
Step 2: Write in a format that includes steps.
This is important because you can’t write a how-to without clearly delineated steps.
Step 3: Familiarize yourself with HowTo structured data properties
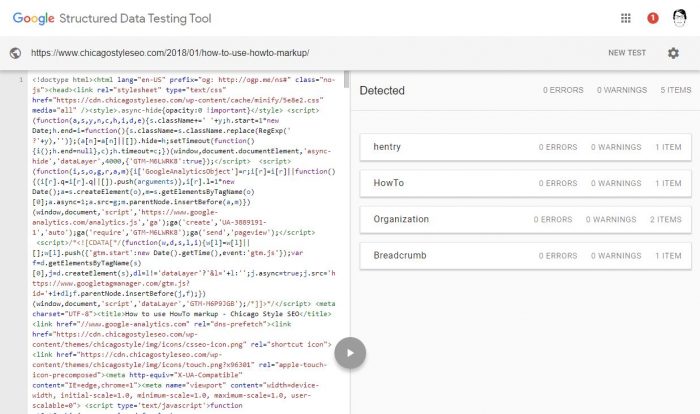
Whether you’re using microdata or JSON-LD to markup your content, you’ll need to get a basic understanding of how it’s used. Check out the example on schema.org of changing a tire, but you can also see the JSON for this article by using the structured data testing tool.
See the short example code below to get an idea of how it can be used:
<!-- This itemscope and itemtype indicates the start and type of schema -->
<div itemscope itemtype="http://schema.org/HowTo">
<span itemprop="name">Name of your How-to article</span>
<span itemprop="description">A short description of your How-to article. This is optional.</span>
</div>
<div>About <span itemprop="totalTime" content="PT30M">30 minutes</span></div>
<!-- This section is an example of one step in a HowTo -->
<div itemprop="step" itemscope itemtype="http://schema.org/HowToSection">
    <div itemprop="name">This is the title of step one</div>
    <meta itemprop="position" content="1"/>
    <div itemprop="itemListElement" itemscope itemtype="http://schema.org/HowToStep">
      <meta itemprop="position" content="1"/>
      <div itemprop="itemListElement" itemscope itemtype="http://schema.org/HowToDirection">
        <meta itemprop="position" content="1"/>
        <div itemprop="text">This is the content that explains more detail about what needs to be done in the first step.</div>
      </div>
Step 4: Be sure to include other HowTo properties.
Besides just steps, you should include as many other HowTo properties as you can. Potential properties include prepTime, totalTime, supply, tool, and yield are a few options.
Below are some common HowTo properties:
- EstimatedCost: How much do the tools cost for instance?
- TotalTime: This is used to indicate how long the project will take. You can also indicate
prepTimefor preparation. - HowToTool: This is an optional property you can use to list what tools are required.
- Supply: Similar to tools, this is if any supply is required by the project.
- HowToSection: This indicates what section of the project. Is it prep, cleanup, or some other type?
- HowToStep: This property indicates which step in the process.
- HowToDirection: Descriptions for the related HowToStep.
- BeforeMedia: An optional before image. Before can be used to describe “before” a certain step.
- AfterMedia: An image showing the end result.
- HowToTip: This is used for extra pointers throughout the process. You could also include this content inside a HowToDirection property.
Step 5: Add markup to the content using either microdata or JSON.
This is the technical part. It isn’t too difficult, but will require a bit of practice. If you choose to use microdata, you’ll be adding HTML around content similar to the example above. Or, if you’re like us, you may prefer to input the information into Google Tag Manager as a Custom HTML tag using JSON-LD and trigger the tag on the appropriate article. If you have no idea what that means, read our tutorial regarding adding breadcrumbs via tag manager. It’s like that only much, much easier.
Step 6: Check for errors using Google’s structured data testing tool.

Navigate to Google’s tool and paste in the URL for your How-to article. If you’ve got zero errors, congratulations! You’ve done it. If you do have errors, the tool will tell you what they are so you can debug them. If you need another example, check out our JSON-LD HowTo structured data for this post.


