Whether they’re for tracking user behavior, running pop-ups, or servicing a live-chat, many of your marketing machinations require placing tags on your website — Google Analytics, Hotjar, OptinMonster, Intercom… the list goes on. Unfortunately, these features come at a cost. Every tag on your site adds more server requests, and more server requests mean your page takes longer to load.
Just take this GTMetrix page speed report for example:

Disregarding the large page size, 270 requests is a lot. Google’s head of Mobile Web, Daniel An, mentioned less than 50 as best practice. What comes with 270 requests is a 15 second page load time, F grades, and a whole lot of users abandoning your website — time for improvement.
Now, sometimes it’s difficult to lower the number of requests. Maybe your homepage needs Adroll, and Hotjar, and Optinmonster, and Floodlight. But, if we can limit the requests on a given page to only the ones that are necessary for that page, we can make a difference in the number of requests on our site as a whole.
Three ways in which Google Tag Manager can improve your site speed
Many people know by now that Google Tag Manager is a convenient place to… erm.. manage tags—they all live in one place and can be added, removed, or edited easily—but few take full advantage of the control the tool affords. Today, we’d like to focus on a few very simple (but no less powerful) rules to follow in your Google Tag Manager container to optimize for site speed.
1. Only fire tags on necessary pages.
Most third party integrations ask you to place their unique code snippet above the <head> on your site. Before Google Tag Manager, this means you would edit the header file, insert your code, and voila — the snippet is above the <head> on every page of your website.
This is all well and good for something like your Google Analytics UA tracking code — you want to make sure that you’re aware of users no matter what page they’re on.
But what if the snippet’s function is to show a pop-up on just a few pages? Or if you’re collecting some page-specific heatmaps? In instances such as these, loading that snippet on every page is a waste. Why add the time to load the snippet on a page which doesn’t need it!
Here’s how to create a trigger that only fires on your desired pages:
- Create a new trigger.
- Under Trigger Type, select “Page View.”
- Instead of our trigger firing on the default “All Page Views,” we want it to fire on “Some Page Views.” This will display some conditions for us to set.
- Using either preset conditions like “contains” or “does not equal,” or a RegEx if you’re capable, write a rule set to trigger your tag on only your desired pages.
- Save your trigger and assign it to your tag.
- Publish the changes.
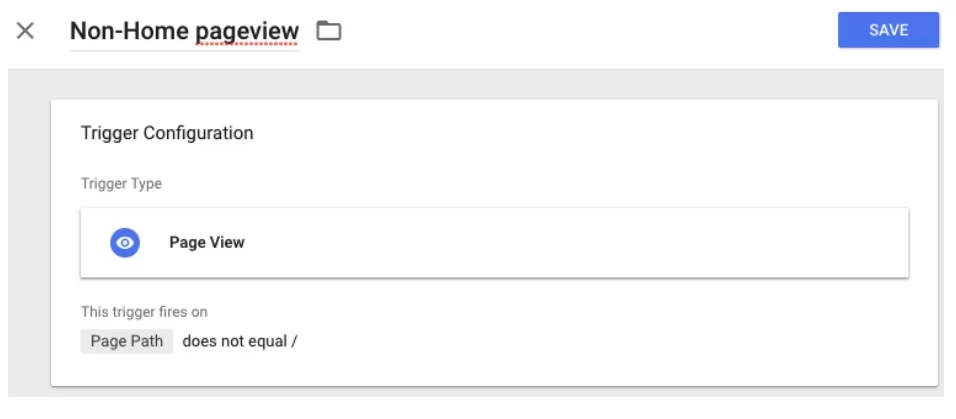
Here’s what my trigger looks like for a tag I’d like on every page except my homepage:

2. Pause tags that are not in use.
Similar to Rule #1, if you’re not planning on using a tag at all for an extended period of time, it’s a pointless waste of resources to continue loading that tag on your site.
In the past, you used to have to either delete a tag or remove its trigger, but Google recently added a “Pause” function that makes temporarily shelving tags incredibly simple:
- Click on the tag you’d like to pause.
- Click the 3 dots at the top right of the window.
- Click “Pause.”
- Save and Publish the changes.
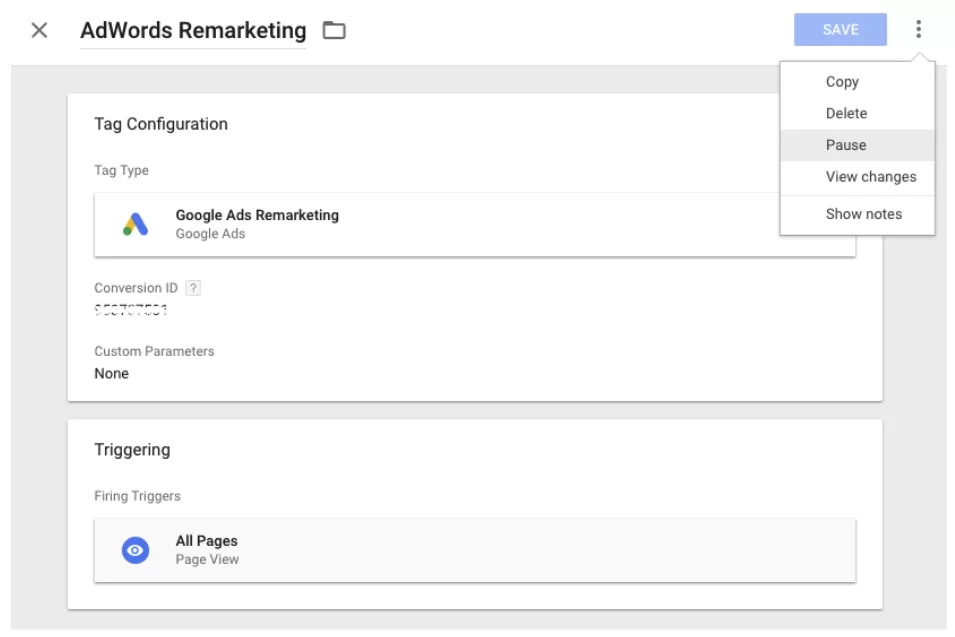
Hypothetically, I wanted to pause my Remarketing campaign for a while. Here’s where to find the “Pause” functionality:

3. Fire certain tags after time or scroll delay.
Users will start reading/interacting with a page before it’s fully loaded, so having a quick initial page load is ideal. If only there was a way to load the essentials first, and delay the secondary page elements…
What do you know: beyond limiting which pages your tags fire on with Page View triggers, Google Tag Manager also gives us the option to delay tags firing with either the Scroll Depth or Timer triggers.
This is a great option for live chat or pop-ups, as they’re often displayed on a delay anyway. Instead of loading the tag immediately and putting the feature on a delay, just load the entire tag on a delay!
Note: Do not put your Analytics code on a delay, as it would create potential blind spots in a user’s session data if they perform an action before the tag fires.
For a Scroll Depth trigger:
- Create a new trigger.
- Under Trigger Type, select Scroll Depth.
- Set your vertical and/or horizontal scroll requirements in either percentages or pixels.
- You can also set Page Path rules in the Scroll Depth trigger, essentially combining with Rule #1 above, or set it to fire on All Pages.
- Save your trigger and assign it to your tag.
- Publish the changes.
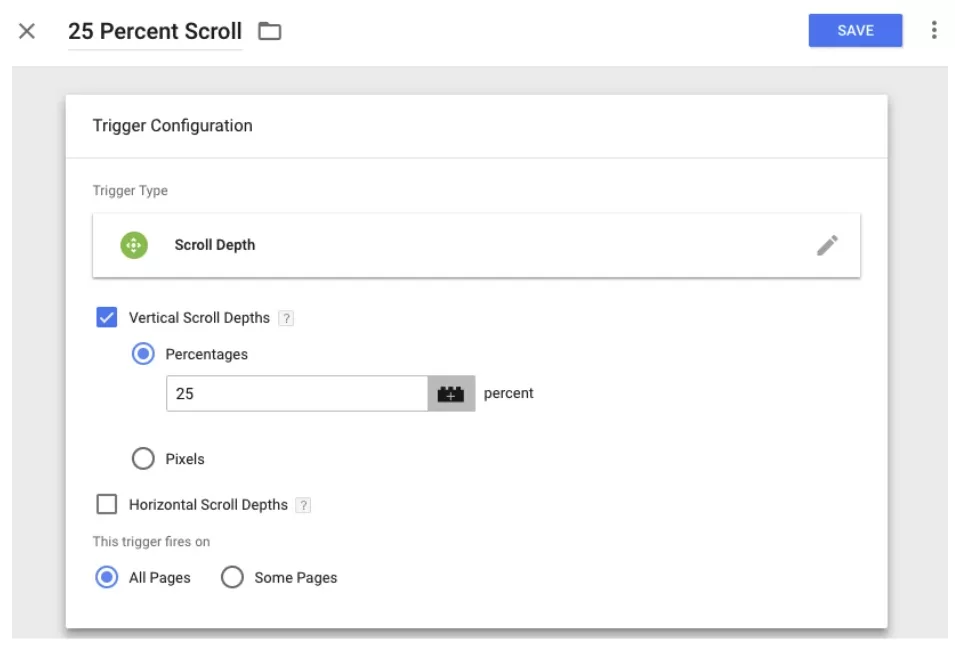
Here’s what my trigger looks like, firing on all pages after scrolling down 25% of the page:

For a Timer trigger:
- Create a new trigger.
- Under Trigger Type, select Timer.
- If you aren’t planning on using several timers on one page concurrently, leaving the Event Name as “gtm.timer” will work.
- Set the Interval to the number of milliseconds you want to delay your tag (1000 is 1 second).
- Set the Limit to “1” so that your tag only fires once.
- You can also set Page Path rules in the Scroll Depth trigger, essentially combining with Rule #1 above, or set it to fire on All Pages.
- If you aren’t planning on using several timers on one page concurrently, leaving the last selection as “All Timers” will work.
- Save your trigger and assign it to your tag.
- Publish the changes.
Here’s what my trigger looks like, firing on my homepage after a 10 second delay:

Fully utilize Google Tag Manager to shave those last few milliseconds off your page load time
Let me be clear, these changes are not going to vastly speed up a slow site. They will, however, help you shave off a few hundred milliseconds from your page load times once you’ve followed other site speed best practices.
Every second (or millisecond) counts. A slow site offers a bad user experience, resulting in higher bounce rates and lower conversion rates, and now Google has explicitly stated that they’re using page speed as a mobile ranking factor.
To make sure you’re doing everything possible to tighten up your page load times, make sure you’re effectively using Google Tag Manager.


