Our Recipe Uses a Calendly Event Listener to Push Event Data into GTM
There are many articles out there touting Calendly conversion tracking. Calendly even has their own native GA integration that’s super simple to set up. However, it has a few major flaws:
- It fires events in your Google Analytics property, but does not attribute source, medium, campaign, nor any other acquisition metric.
- It can only connect to one property. What if you have one Calendly account working across multiple GA properties? No luck!
- Using UTMs, you can pull values from the URL with JavaScript. However, this comes with the enormous downside of only working if users convert on the same page they landed on — not to mention it’s complicated to set up.
In this guide, we’ll show you how to track Calendly bookings in Google Analytics with all the attribution you would expect—source, medium, campaign, and any other details. As a bonus, since this method is based on Google Tag Manager, you can tie the same events to Facebook pixel conversion tags.
How to set up Calendly conversion tracking
Note: This post has been updated to include instructions for tracking Calendly events in GA4, with special attention to the iframe implementation that most current Calendly widgets use.
This guide will give you the tools to push Calendly events into the dataLayer, and use a custom calendly event listener tag in GTM to pick up those events and send them to Google Analytics. If that sounds complicated, it is. But my team has done the hard work to set up all the tools for you.
Setting up tracking will require:
- Creating a Custom HTML tag in GTM that listens for Calendly events across the iframe boundary.
- Creating Custom Event triggers in GTM to fire on specific Calendly actions.
- Updating the GA4 configuration to recognize these events and track them as conversions.
- Testing and debugging.
- Configuring Events as Conversions in GA4
If you’d like a shortcut, you can import our GTM recipe, which will include all the tags, triggers, and variables. You’ll just need to modify your GA4 measurement ID.
Step 1: Setting Up the Calendly Event Listener
This is the easy part. If you haven’t created a Custom HTML tag in GTM before, it’s a simple process.
- In Google Tag Manager, go to “Tags” and click “New”.
- Name your tag “Calendly Event Listener”.
- Choose “Custom HTML” as the tag type.
- Paste the following code into the HTML field:
<script>
  window.addEventListener('message', function(e) {
    // Only process Calendly events
    if (e.data.event && e.data.event.indexOf('calendly.') === 0) {

      // Extract the event type (remove the "calendly." prefix)
      var eventType = e.data.event.replace('calendly.', '');

      // Skip page_height events - these are just noise
      if (eventType === 'page_height') {
        return;
      }

      console.log('Calendly event captured:', eventType);

      // Push to dataLayer for GTM
      window.dataLayer = window.dataLayer || [];
      window.dataLayer.push({
        'event': 'calendly_event',
        'calendly_event_type': eventType,
        'calendly_payload': JSON.stringify(e.data.payload || {})
      });
    }
  });
</script>
Note: You can add this same listener alongside your embed Calendly embed script if you’d rather keep it outside of GTM.
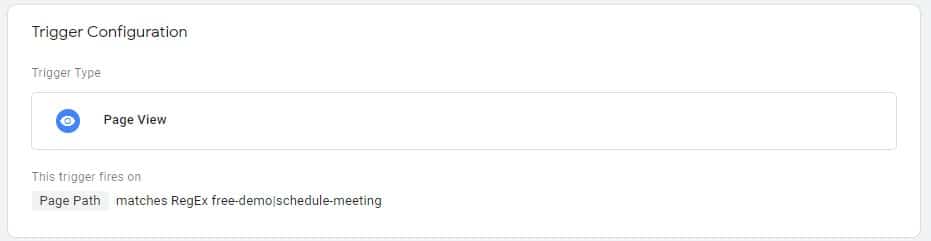
Step 1.1: Create a page view trigger
This tag will need a trigger to fire. If your Calendly widget is embedded on all pages you can use the default All Pages trigger. If the Calendly widget is embedded on only a handful of pages, you should create a pageview trigger to match only those URLs.
For example, if the same Calendly widget is embedded on a /free-demo page and a /schedule-meeting page, then you could create a matching regex pageview trigger to fire with the following conditions:
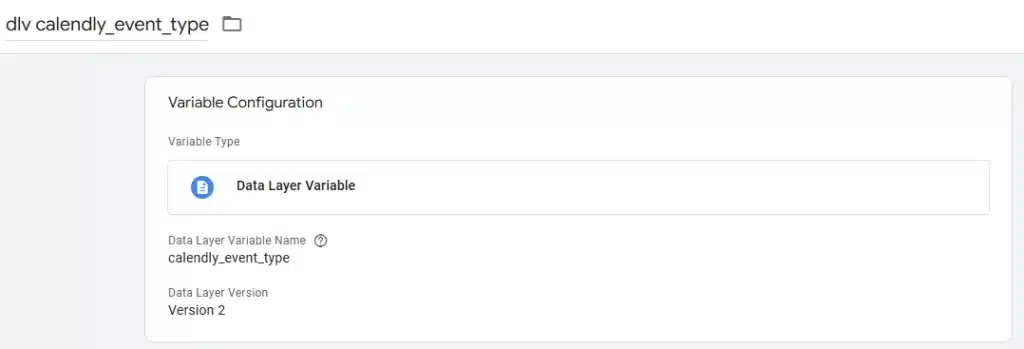
Step 2: Create a Data Layer Variable for Calendly Events
Before setting up triggers, we need to create a data layer variable to capture the Calendly event type:
- In GTM, navigate to “Variables” and click “New” under “User-Defined Variables”.
- Name the variable “dlv calendly_event_type”.
- Choose “Data Layer Variable” as the variable type.
- For “Data Layer Variable Name”, enter “calendly_event_type”.
- Leave “Data Layer Version” as “Version 2” (the default).
- Click “Save”.
This variable will access the event type that our Calendly Event Listener script pushes to the data layer. It’s an essential component for creating specific triggers based on different Calendly events.
Step 3: Create Custom Event Triggers in GTM
Now that we have our event listener set up, we need to create a trigger that fires when Calendly events occur.
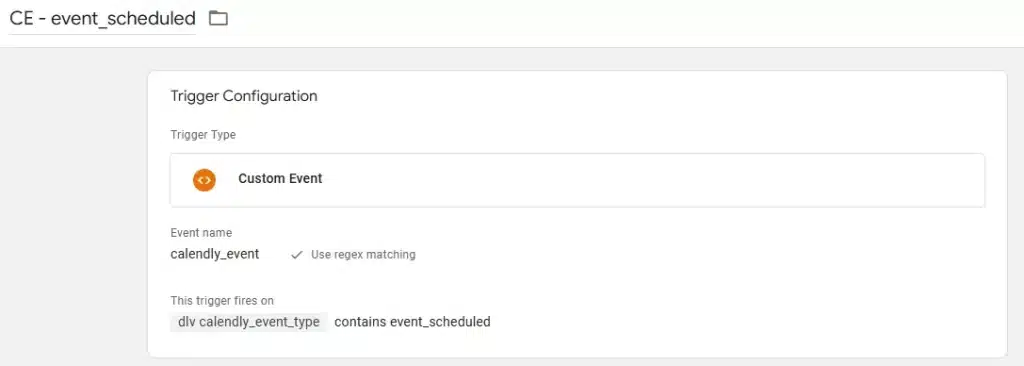
- In GTM, go to “Triggers” and click “New”.
- Name your first trigger “CE – event_scheduled”.
- Choose “Custom Event” as the trigger type.
- Set the Event Name to
calendly_event. - Check “Use regex matching” if needed.
- Under “This trigger fires on”, select “Some Custom Events”.
- Set the condition: “dlv calendly_event_type” contains “event_scheduled”.
- Save the trigger. Repeat this process to create additional triggers for the other important Calendly events:
- “CE – date_and_time_selected” with condition “dlv calendly_event_type” contains “date_and_time_selected”
- “CE – event_type_viewed” with condition “dlv calendly_event_type” contains “event_type_viewed”
- OPTIONAL: “CE – profile_page_viewed” with condition “dlv calendly_event_type” contains “profile_page_viewed”
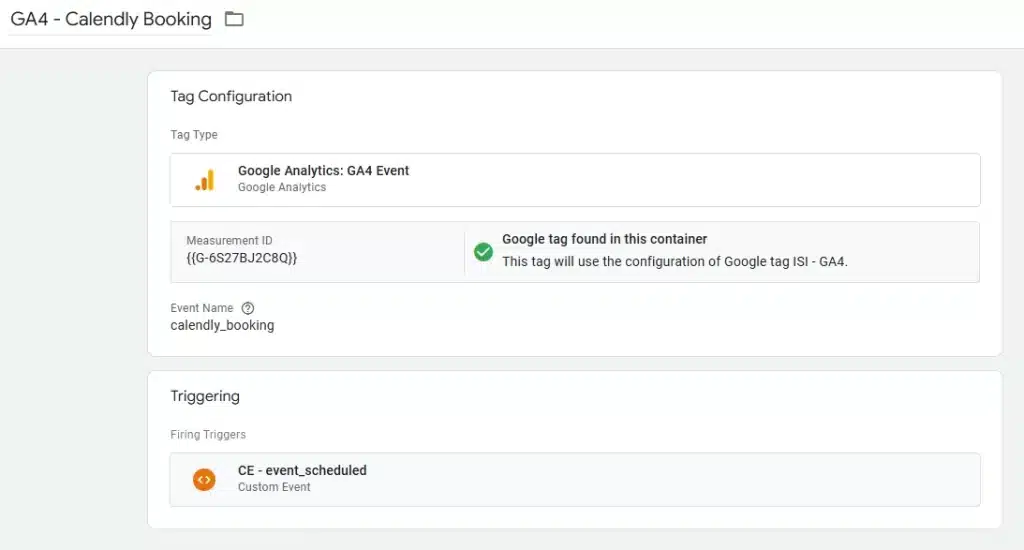
Step 4: Create GA4 Event Tags
Now let’s create tags that send these events to GA4:
- Create a new tag named “GA4 – Calendly Booking”.
- Choose “Google Analytics: GA4 Event” as the tag type.
- Enter your GA4 Measurement ID or use your GA4 Configuration variable.
- Set the Event Name to
calendly_booking. - Select the “CE – event_scheduled” trigger.
- Save the tag.
- Create additional event tags for tracking the user journey:
- “GA4 – Calendly – Pick Date” using the “CE – date_and_time_selected” trigger
- “GA4 – Calendly Event View” using the “CE – event_type_viewed” trigger
- OPTIONAL: “GA4 – Calendly Profile View” using the “CE – profile_page_viewed” trigger
Step 5: Test and debug your container
Now that you have the tag set up and modified to reference your GA4 measurement ID, it’s time to test and debug.
Preview your container in the new window. You should see the Calendly events firing on pages based on the page view trigger you set up.
Test that your Calendly events are being tracked when users interact with the booking widget. The most important event is event_scheduled which indicates a successful booking.
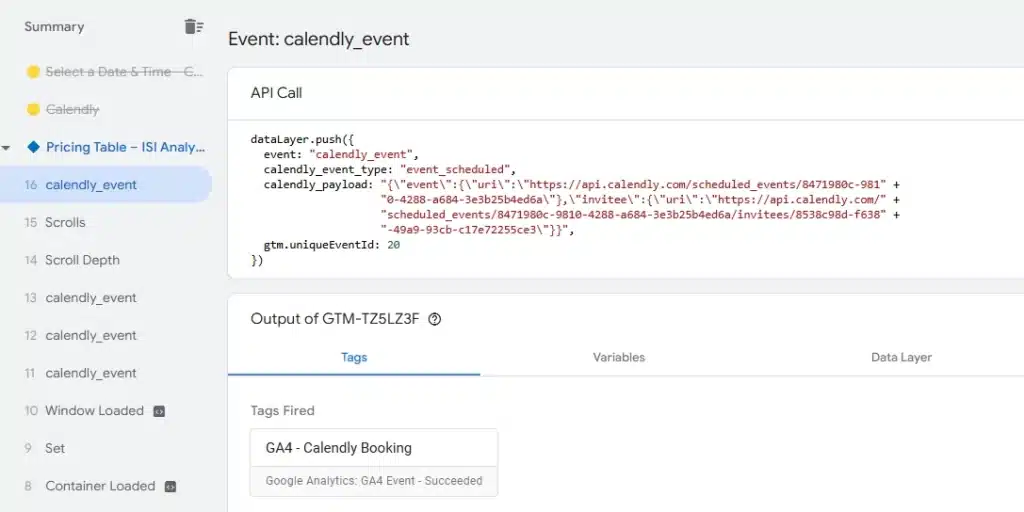
Test that all three (or four) of your Event tags are firing when you interact with Calendly:
- GA4 – Calendly Profile View fires on views of the your booking events
- NOTE: This view only exists if your widget lets users select from one of multiple booking events. Do not include if you don’t have this type of widget
- GA4 – Calendly Event View fires on views of the widget
- GA4 – Calendly Pick Date fires upon selecting a time and date
- GA4 – Calendly Booking fires upon scheduling a meeting
Step 6: Mark Calendly Events as Conversions in GA4
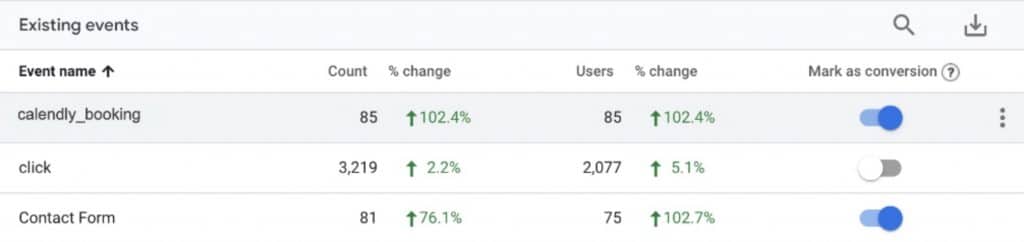
If all events fired, congratulations! Your container is ready to be published. Based on the tag settings you imported, GA4 will begin populating the following events:
- calendly_event_viewed
- calendly_select_date
- calendly_booking
- IF INCLUDED: calendly_profile_viewed
If you would like to mark any of those events as a conversion (we recommend using only calendly_booking for conversion tracking), navigate to Configure > Events and use the toggle switches to enable Calendly events you’d like to set as conversions.
Other considerations
This implementation works with the iframe-based Calendly widgets that are now standard. The key difference from previous methods is that we’re using the browser’s window.addEventListener(‘message’, …) approach to listen for messages that Calendly sends from inside the iframe to the parent window.
Some important notes about this approach:
- We filter out ‘page_height’ Calendly events as these are technical events that fire frequently and don’t represent meaningful user interactions.
- The script works across any page where Calendly is embedded, with no need to modify the Calendly embed code itself.
That’s it! If you run into trouble, send me an email at ben.hicks@ our domain.