
Sometimes things go wrong, a page gets deleted or moved, and you suddenly have a broken link that’s sending users to a 404 page. With Google Tag Manager and Google Analytics, it’s easy to find new 404s without having to run a broken link crawl.
In this guide, we’ll walk through the process of using Google Tag Manager to fire an event in Google Analytics every time a user finds their way to our site’s 404 page. We’ll also show you where to find this new 404 event data in Google Analytics so you can quickly identify (and fix) any 404 errors on your site.
Table of Contents
Setting up the 404 trigger and tag in Google Tag Manager
Step 1: Finding a way to trigger a tag based on page title
How this trigger and tag will work: we are going to create a variable in GTM that pulls the page title of the page a user is currently on. Whenever a user visits a page with a page title that matches our 404 title, we’re going to fire our custom event in Google Analytics.
Create a User-Defined Variable for page title
- Go to “Variables” and under “User-Defined Variables,” click the “New” button.
- Give your variable a title. For our example, we’re calling our variable “JS – Page Title” since we are going to be pulling the page title via JavaScript.
- As the “Variable Type,” select “JavaScript Variable.”

- In the “Global Variable Name” field, enter document.title
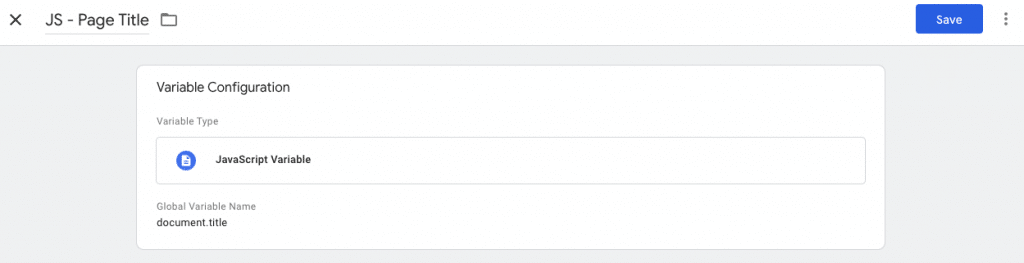
- Click “Save.”
Step 2: Making a trigger that only fires when our 404 page is viewed
Using the Page Title variable we just created, we are going to create a trigger that only fires when that new variable matches our 404 page’s title. Many websites have “Page not found” as the 404 title tag by default, but check to make sure the string you use matches your 404 page.
You’ll also want to make sure the string only matches your 404 page, and no other pages lest you have perfectly fine pages showing in your Google Analytics 404 error report.
Create a Page View Trigger with your new variable as a condition
- Go to “Triggers” and click the “New” button.
- Name your trigger something like, “PV – 404 page”
- Select “Page View” as the trigger type.
- Select “This trigger fires on Some Page Views”
- For the firing conditions, select the user-defined variable we just made, “JS – Page Title,” and input a pattern that matches the page title on your site’s 404 page. For our site, if you go to https://pilotdigital.com/show-me-a-404 you will see that our 404 page title is “Page not found – Pilot Digital” so I’ve made the title conditions “contains Page not found.”
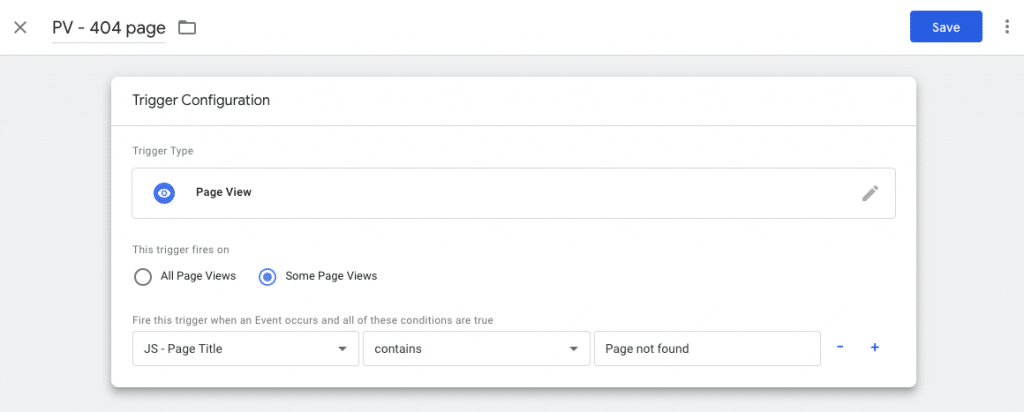
- Click the “Save” button.
Step 3: Making a tag that sends all the relevant information about your 404 errors to Google Analytics
Knowing the prevalence of 404s on a website is pretty much useless information. In order to fix the 404s, we need to know:
- The URL of the broken link
- The URL of the page that contains this broken link
With our Custom Event Tag, we can send this information directly into Google Analytics, making these errors easy to spot and fix.
Create a Google Analytics event tag
- Create and name a new tag.
- Click into the “Triggering” section at the bottom of the page and select the trigger you just made.
- Click “Tag Configuration > Google Analytics: Universal Analytics”
- Select Event as the “Track Type” — this will fire an Event in Google Analytics when a 404 page is visited.
- For the Event Tracking Parameters, let’s enter “404 Errors” as the Event Category.
- For the Action, use {{Page Path}} so that you can see which URL is returning the 404 error.
- For the Label, use {{Referrer}}. This will help you easily locate the broken links on your site that need to be fixed.
- In “Google Analytics Settings,” add your Google Analytics account’s GA Variable. This is your unique 10 digit tracking code that begins with “UA–”
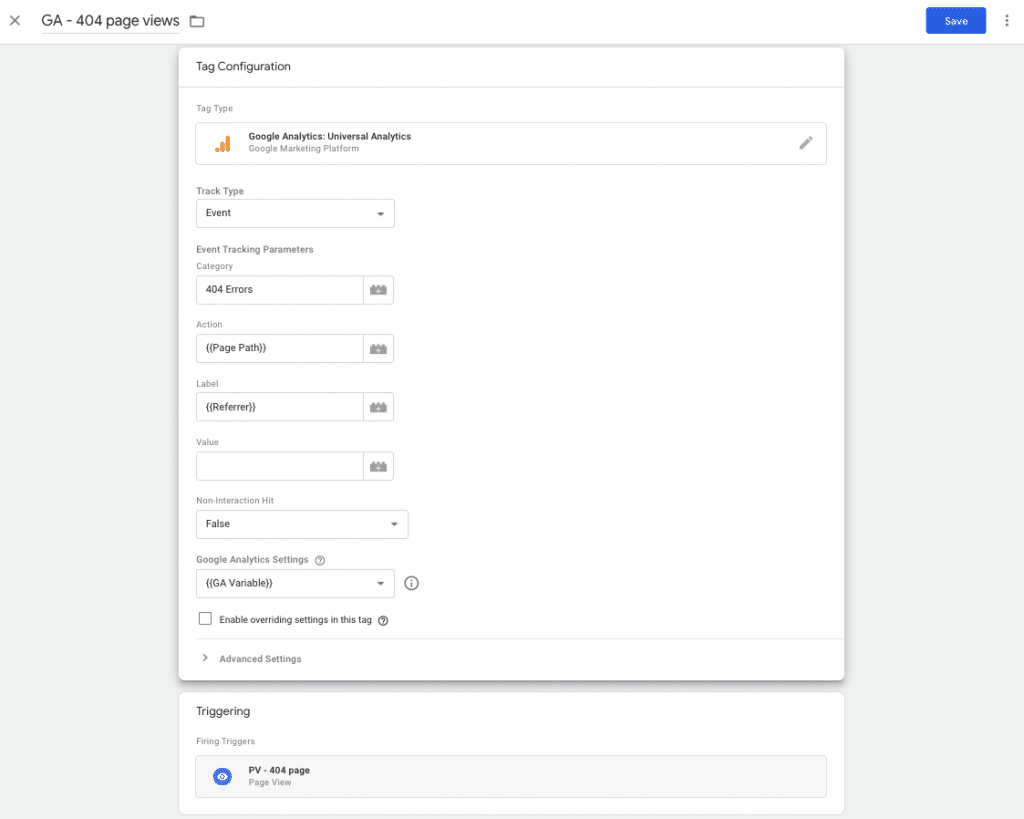
- Click “Save”
- Click “Preview” to use GTM’s debugging mode to test whether your tag is indeed firing properly when visiting a 404 page. If so, click “Submit” and publish your new container.
Finding the 404 Errors in Google Analytics
To see instances of our new 404 Errors event in Google Analytics,
- To find all Events, visit Behavior > Events > Top Events in the lefthand sidebar of your Google Analytics account.
- Find “404 Errors” in the Event Category column (row 11 in the screenshot below). These are instances of 404 pages being viewed during the time frame of data you’re looking at.
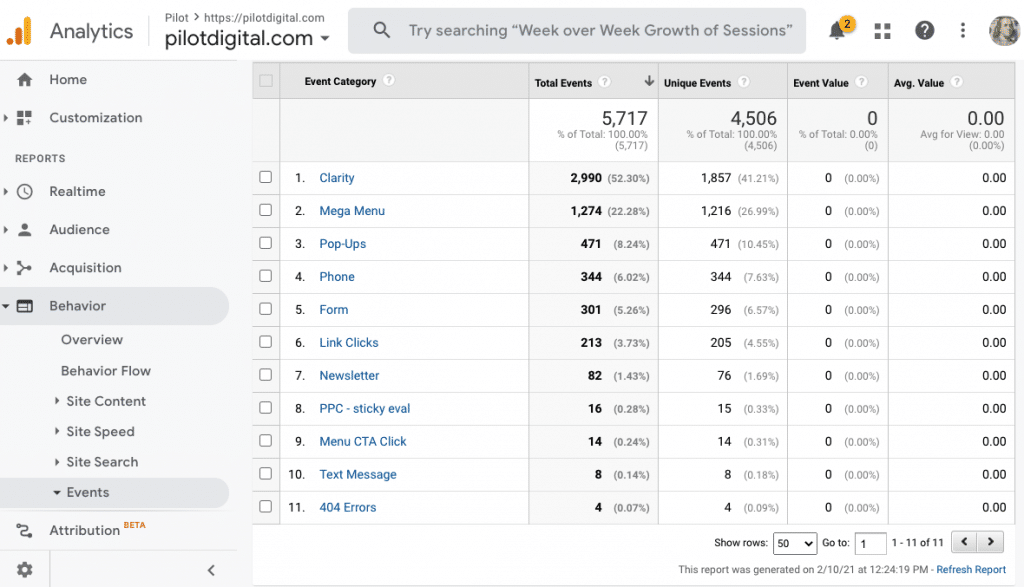
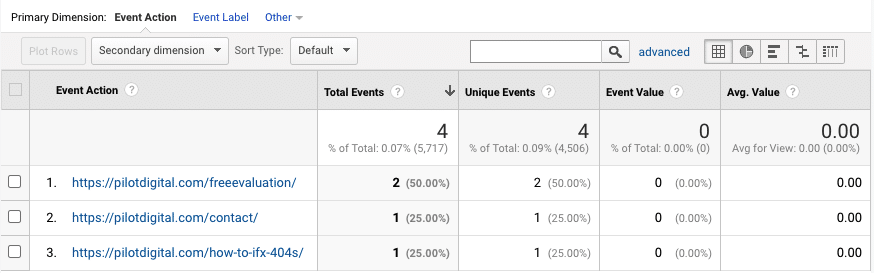
- If you click on “404 Errors,” you are brought to the Event Action view of that particular event. If you recall how we set up our event tag in GTM, the Event Action tells us the {{Page Path}}, or the URL itself that is returning a 404 error.
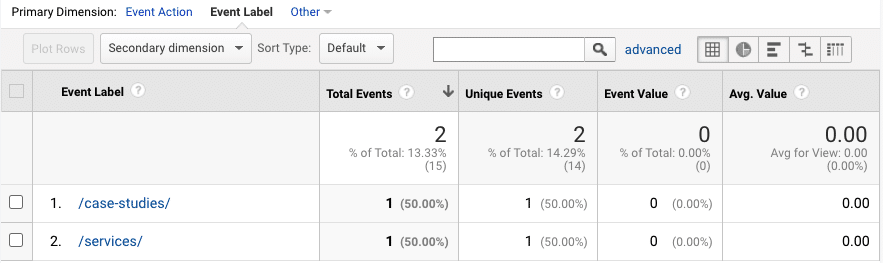
- If you click on any of these URLs, you will be brought to that URL’s Event Label view. This shows us which pages are actively linking to this 404 error. These are the pages we will have to edit to find and fix the broken link.
Voilà! Now you’re actively tracking broken links in Google Analytics, and can quickly find exactly where the broken link needs to be fixed.