
Follow our guide below to migrate your existing Universal Analytics property to a new GA4 property
With the coming sunsetting of Universal Analytics (UA) in July 2023, now is the time to start tracking your data in Google Analytics 4. While you’ll still have some time to get yourself familiar with how GA4 works (warning: it’s quite different!), it’s a great idea to set up tracking as soon as possible so that you’ll be able to do more historical analysis once the switch to GA4 is complete.
We’ve been busy migrating existing UA set ups to GA4, making sure that all the important data is being sent to the new platform, and we developed a checklist that we think will be helpful to anyone looking to perform a migration of their own.
Keep in mind that the following guide requires that you run your existing Universal Analytics setup via Google Tag Manager (GTM), which is how we set up analytics tracking for ourselves and our clients. Managing a GA4 account without the use of GTM is possible, but an in-depth configuration done this way will likely require the help of a developer to push custom events to GA4 directly within the code of your website.
In short, using GTM to manage your GA4 tracking will be the easiest and most efficient method for the vast majority of users (and typically won’t require too much help, if any, from your developers).
Create your GA4 property
1. Open the UA property you’d like to migrate
2. Open the GA4 Setup Assistant under Admin > Property Settings
Where prompted to “create a new Google Analytics 4 property,” click the Get Started button:

3. Create your GA4 property
After clicking the Get Started button in the GA4 Setup Assistant, you will be shown the following prompt:
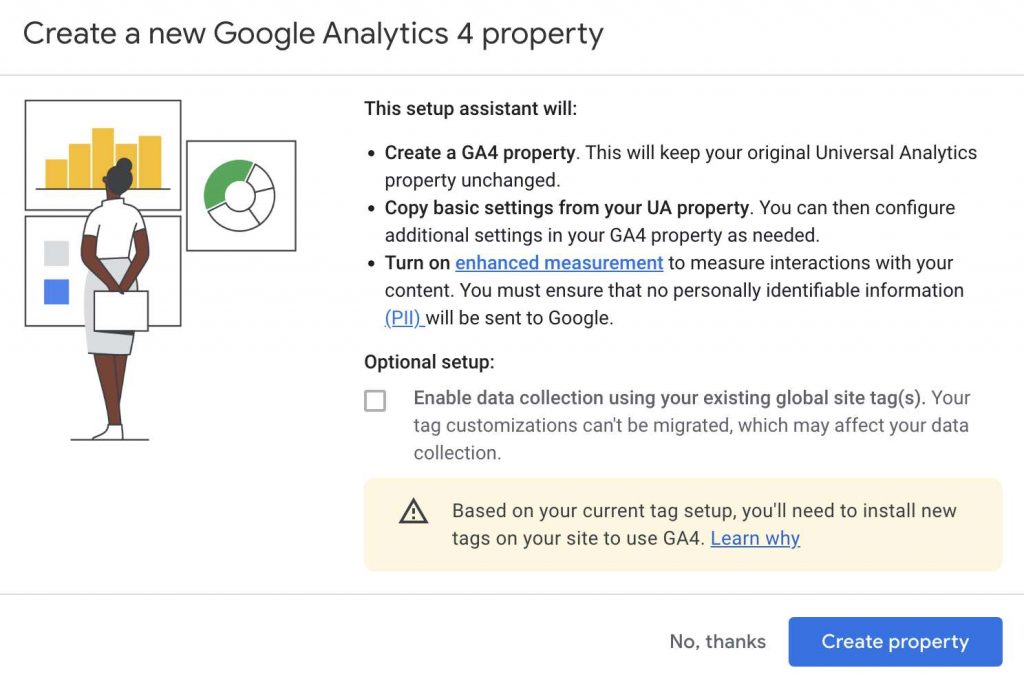
We recommend you do not check the box to “enable the data collection using your existing global site tag(s).” By checking this box, your GA4 account will attempt to populate events directly from your UA setup. This will severely limit your ability to customize your GA4 tracking.
Leave this box unchecked, and click the Create property button.
Add your GA4 tracking script to all pages
4. Open the GTM container that you’ve installed on your site
5. Add your GA4 configuration tag
The GA4 configuration tag is the tracking script that enables page view tracking (and the host of other built-in events that track out-of-the-box), and is also the conduit through which we will send all other custom events in GTM to our GA4 account.
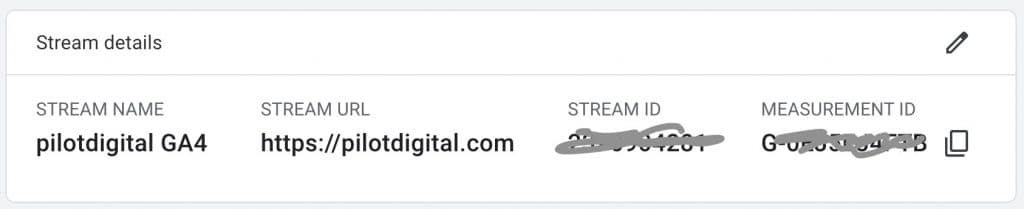
- Copy the Measurement ID from GA4 — In the Admin section of GA4, go to the Property settings and click “Data Streams.” Select your Data Stream and find your Measurement ID in the “Stream Details” section. Copy this ID:
- Add a GA4 Config tag in GTM — In GTM, click to add a new tag. For “Tag Type,” select “Google Analytics: GA4 Configuration.”
- Paste your Measurement ID — In the “Measurement ID” field, paste the Measurement ID you had just copied from your GA4 account’s Data Stream.
- Send page view events from this tag — To make sure we’re sending page view events to our new GA4 account, check the box that says “Send a page view event when this configuration loads.”
- Name the tag — Name this tag something like “GA4 Config”
- Add a trigger that fires on all page views — We want this tag firing on all pages of our site, so add a Page View trigger to fire on all pages.
Migrate the UA events you’re tracking in GTM to your GA4 account
6. Identify the tags in GTM that are sending events to Universal Analytics
If you want to continue sending events to GA4 when certain actions are taken by your users, identify the tags in GTM that are currently sending these events to UA.
7. Create a new GA4 Event tag using the same trigger as the UA event tag you’re migrating
- Create a tag — In GTM, click to add a new tag. For “Tag Type,” select “Google Analytics: GA4 Event.”
- Designate your GA4 config — In the “Configuration Tag” field, select the “GA4 Config” tag you created in Step 5.
- Name the GA4 event — For the “Event Name,” add the event name that you would like to send to GA4 when this event fires. NOTE: GA4 requires that events be named in snake case, all lowercase with underscores(_) instead of spaces. Example being snake_case. We recommend sticking to a logical nomenclature for your events: forms could start with form_ (form_contact, form_service_x, form_service_y), clicks could start with click_, etc.
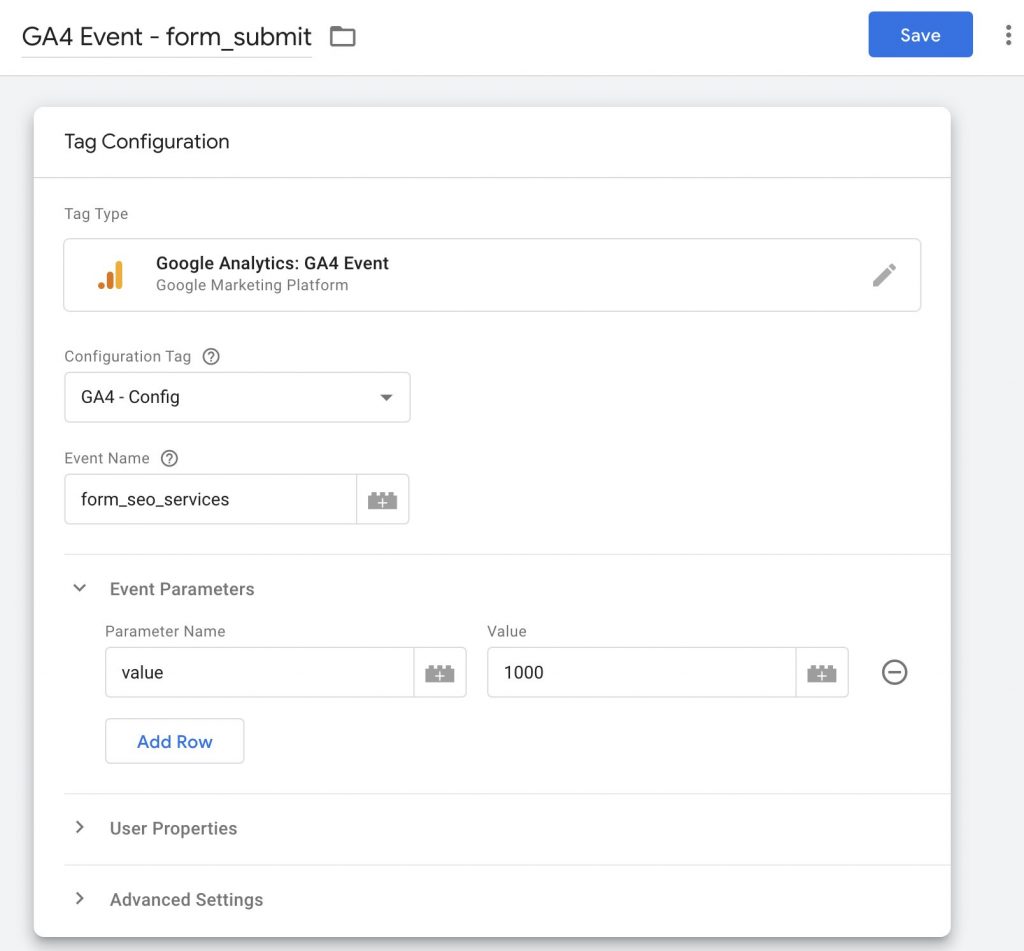
- (optional) Add event parameters to be sent alongside your event — If you’d like to send additional data with your events beyond what is automatically tracked by GA4 (like page_location, page_referrer, etc.), you can add those as “Event Parameters.” You can use event parameters to attach data that’s already recognized in GA4, like a parameter named value which sends the monetary value of a given event, or you can send custom event parameters that are of interest to you, e.g. a parameter named button_clicked with the value being a variable that pulls the button ID.
- Name your GA4 event tag in GTM — To keep your GTM container organized, stick with a nomenclature like “GA4 Event – {{insert event_name}}”
Here is a screenshot of a GA4 event tag that sends the form_seo_services event to our GA4 account, with the added parameter of “value” that we’ve designated to be $1000.
- Use the same trigger as the old UA event — Since we want our GA4 event to fire the same way our UA event was firing, use the same trigger for your new event that you used to fire the UA tag you’re migrating.
8. Repeat step 7 for all UA events in GTM that you’d like to migrate to GA4
Define conversions and custom dimensions/metrics in GA4
Now that you’re sending events to your GA4 account, it’s time to mark specific events as conversions. Conversions are to GA4 what Goals were to UA, they have decided to call them by a different name.
9.a. Mark your most vital events as conversions
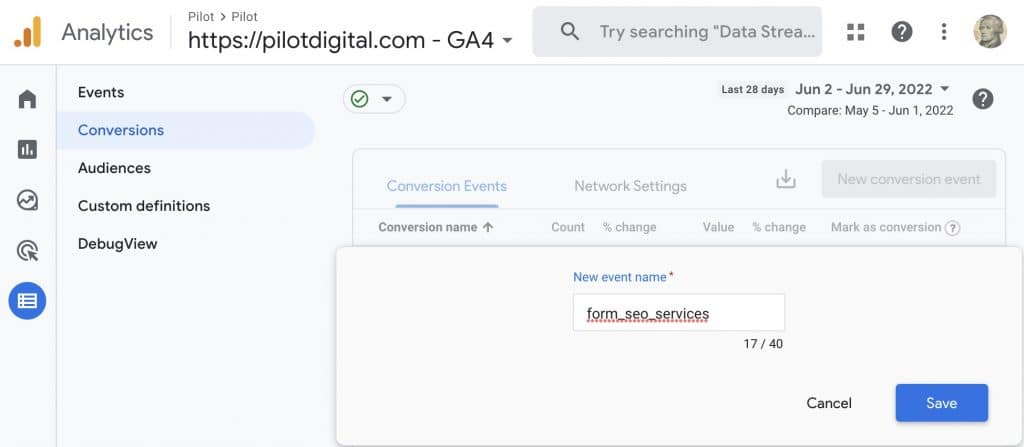
If you’d like an event you’ve created in step 7 to be reported as a conversion in GA4, go to Configure > Conversions in your GA4 account and click New conversion event. In the field, add the “Event name” in question from the event you created in Step 7 (e.g. “form_seo_services”).
Alternatively, if some time has passed since you implemented step 7 and you’ve already collected at least one instance of your event, you should see it in the list of events here. Instead of adding the conversion event as described above, you can simply click the “Mark as conversion” slider to the right of your event to begin tracking it as a conversion. Either way works, both achieve the same result.
9.b. You can circumvent GTM to create events directly in GA4 based off of other events
Admittedly, this step might sound confusing. We recommend using GTM to drive events whenever possible, even if you want to send an event for a specific page view. But if for whatever reason, you want to forgo using GTM to send a particular page view event to GA4, you can create an event directly in GA4 that will track based off parameters you set.
The simplest example of this type of event set up would be when a user views of a thank you page.
To create this GA4 event:
- Go to Configure > Events and click Create event, then click Create.
- Add your snake_case event name in the “Custom event name” field.
- Creating matching conditions that designate when this event will fire. If you’re trying to drive this event based on a page view, you will use the page_location Parameter to set your conditions.
- Check “Copy parameters from the source event” to send the same parameters from the page_location event with your newly created event.

10. If you’ve added any custom event parameters (ones not accepted by default in GA4) in Step 7, register these as custom dimensions or metrics in GA4
In our Step 7 example, we noted you might want to send additional data into GA4 alongside your events. These are sent as event parameters. For ones like “value,” you won’t have to register them in GA4, but ones that you came up with yourself must be registered as either a custom dimension or custom metric in GA4, otherwise they won’t show in reports.
- Go to Configure > Custom definitions in GA4
- For a custom dimension, stay in the “Custom dimensions tab.” If you’re registering a custom metric, click to the “Custom metrics” tab before following the remaining steps below.
- Add a “Dimension name,” which will be what shows as the dimension name in GA4 reports
- For “Scope,” select whether the scope of this dimension is at the event or user level
- For “Description” you can add a quick blurb further describing what this dimension actually is
- For “Event parameter” add the snake_case parameter that you are sending with GTM. In our example in Step 7, we used “button_clicked” as our custom event parameter
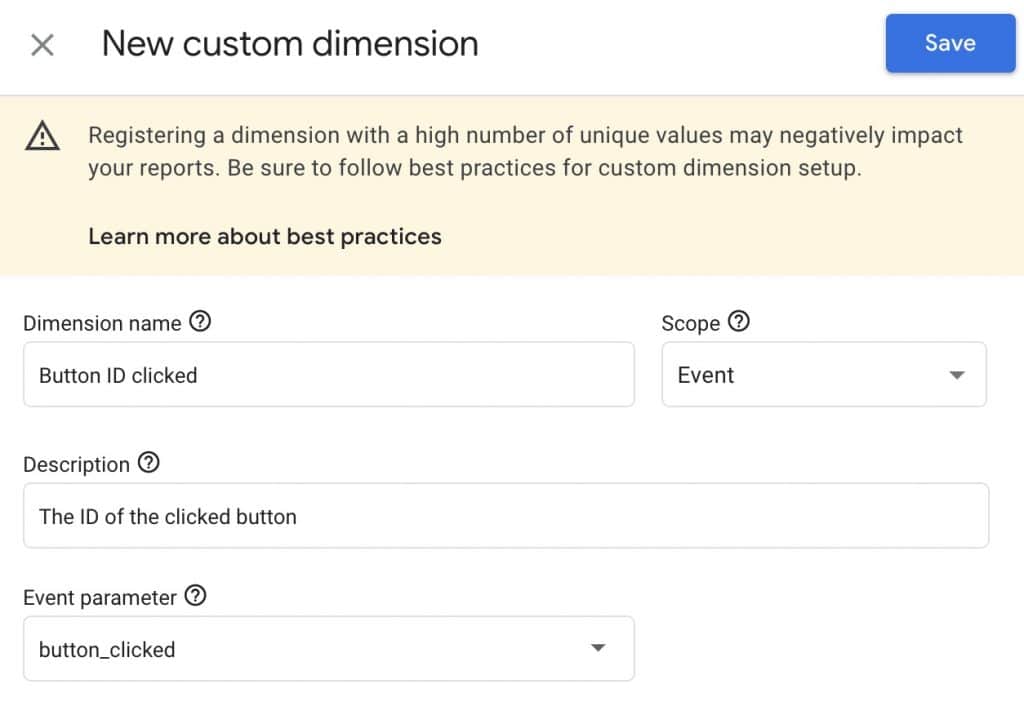
WARNING: You’ll note the warning in the screenshot above to avoid custom dimensions that may collect a high number of unique values. This will lead to cardinality in your GA4 reports, meaning you will likely see sampling in your reports instead of actual values of your data. Do not register a custom dimension that could theoretically have an infinite number of values, like a user ID for example.
Additional GA4 Configurations
Congratulations! Your GA4 account is now tracking the GA4 event versions of the same data you were collecting in Universal Analytics. Now it’s time to make some final tweaks to the GA4 settings to finish your setup.
11. IP Filters
Filtering out internal traffic works a little differently in GA4:
- Go to Admin > Data Streams > Select Stream > More Tagging Settings > Define internal traffic in GA4 and click Create
- Name your rule to describe the list of IPs you’re about to add, something like “Home Office IPs”
- Add your list of IP addresses
- Click Create
- Then, we have to make sure the filter is active, which is different from UA. Go to Admin > Data Settings > Data Filters > Internal Traffic and set this the Filter state to “Active”
12. Debug Filter
If you plan on using GTM’s debug mode, GA4 now gives you the ability to use the GA4 debug mode in conjunction to see your debugging events as they come into GA4. But to make sure we’re filtering these events out of the live data:
- Go to Admin > Data Settings > Data Filters > Create Filter in GA4
- Name your filter something like “Exclude debug traffic”
- Set the Filter state to “Active”
13. Referral Exclusions
If you’re excluding certain referrals from your referral traffic in UA, you can replicate this in GA4 by doing the following:
- Find your referral exclusions in UA – Go to Property > Tracking Info > Referral Exclusion List in UA
- Add these in GA4 – Go to Admin > Data Streams > Select Stream > More Tagging Settings > List unwanted referrals in GA4
- Add the domain(s) you found in UA to exclude them from your referral traffic
14. Cross-Domain Tracking
If you’re collecting data from multiple domains in the same GA4 account and would like to enable cross-domain tracking:
- Go to Admin > Data Streams > Select Stream > More Tagging Settings > Configure your domains in GA4
- Add the domains you would like to enable cross-domain tracking for
15. Enable Enhanced Measurement
New to GA4 is Enhanced Measurement; just by simply adding your GA4 Configuration tag to a site and enabling Enhanced Measurement, you will track the following events in GA4 automatically:
| Event | Description |
| scroll | 90% vertical depth of page scrolled (this scroll threshold can be edited) |
| click | Each time a user clicks a link that leads away from the current domain |
| view_search_results | Each time a user performs a site search, indicated by the presence of a URL query parameter |
| video_start | For embedded videos that have JS API support enabled |
| video_progress | For embedded videos that have JS API support enabled |
| video_complete | For embedded videos that have JS API support enabled |
| file_download | Clicks on any of following file types: pdf|xlsx?|docx?|txt|rtf|csv|exe|key|pp(s|t|tx)| 7z|pkg|rar|gz|zip|avi|mov|mp4|mpe?g|wmv|midi?|mp3|wav|wma |
This is enabled by default, but to double check, go to Admin > Data Streams > Select Stream in GA4 and make sure that “Enhanced measurement” is checked:
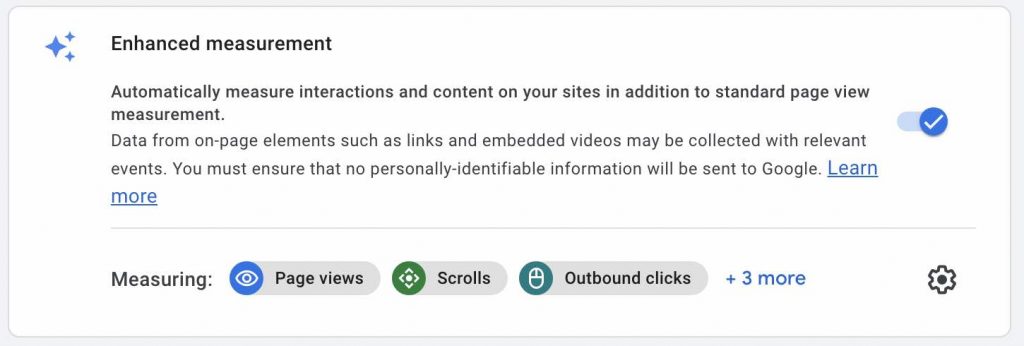
You can also click the gear to turn off specific Enhanced Measurement events if you don’t want to track them, or if you’d rather track them a different way (like with GTM).
15. Data Retention
By default, GA4 sets your event data retention to 2 months. This means that event data you send that is associated with cookies, user identifiers, or advertising identifiers will be removed after 2 months… not great! While this won’t affect most of your standard reporting, some of the more advanced analysis will most definitely be affected.
You can choose to up this retention period to 14 months by going to Admin > Data Settings > Data Retention in GA4 and changing the period from “2 months” to “14 months.” While it’s not forever, it’s better than 2 months.
Get your UA to GA4 migrations done as soon possible!
The sooner you migrate your setup, the better. As of the publishing date of this blog, we are officially one year out from the sunsetting of UA, and permanence of GA4 as the main Google Analytics platform. So, if you want to make sure you can do year-over-year analysis come this time next year, you need to have GA4 up and running.
The guide above is fairly basic, but even still, many who attempt creating a GA4 will run into issues. If you’d like some help, or if your current Analytics setup is complicated, we are now offering GA4 migration services!